Writing a Custom Blueprint
Prerequisites
Before creating a custom blueprint, you need to choose
- The name of the service the component will be deployed to
- and the name of the queue that this task will read from.
- We suggest naming your first queue
default. As the service gets more complicated, you may need to create other queues with different names.
- We suggest naming your first queue
You also need an empty folder for this project.
📂 Structuring your directory
Indico has specific conventions for structuring directories that contain component tasks. We recommend following these conventions at first. Feel free to experiment in future projects once you have become more comfortable with how components work. To follow the Indico convention:
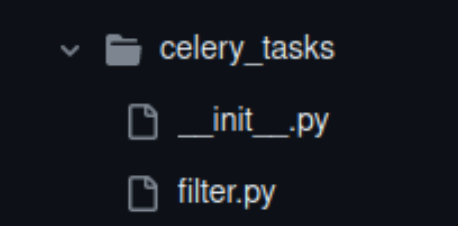
- Inside the folder for your project, create a folder named
celery_taskswhere you will store code for custom blueprints.
NOTE: This folder is named after the Python task management library Celery since that's what the Indico task management system is based on.
- Inside the folder you just created, make two Python files: an
__init__.pyand a second where you will write your task. We suggest calling the second folder after the type of task you would like to build.

🌐 Creating a Jetstream app
Declare a Jetstream app in the __init__.py file.
✏️ Writing your task
Inside the second file, define your task and write the custom logic for your task.
Task basics
Certain patterns and practices are common to all tasks, regardless of type. To learn more, follow this recipe:
Inputs, outputs, and and custom logic
Once you have completed the recipe for writing your first custom blueprint, explore the recipes below to define the inputs and outputs and add custom logic.
For more information on which inputs and outputs are required for different tasks, see Required Inputs and Outputs.
Updated 9 months ago
